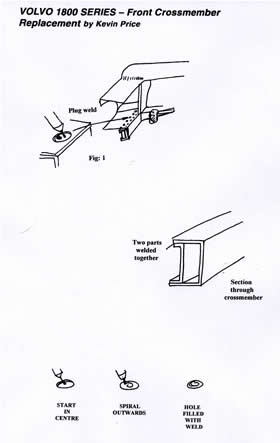
VOLVO 1800 SERIES – Front Crossmember Replacement By Kevin Price
The front Crossmember, under the radiator is a major area for rust on the 1800 range. Although the member may appear solid in the rear section, the area which can be viewed from under the car and the engine bay, the front section, behind the front valance can in some cases be totally rusted away and still have a valid or even new MOT. In fact MOST 1800’s I inspect which have not had this area replaced, have some rust in this area including some SHOW CARS. It is, I have to say, a very common area for rust. All a800 owners should regularly check this section for rust, as it is a major area, holding the front of the car apart and taking the stress of the steering mechanism. To check, it will require you getting under the car and sliding your hand up the inside of the front valance to feel the front crossmember.
Repair of this area can be costly. Many vehicle repairers, including some Volvo Specialists opt to cut off the front valance which makes the repair of the crossmember easy but does involve welding back the valance and costly repainting to finish.
An alternative method I have used does not require removal of the front valance or any repainting to the outer bodywork. My method is as follows: firstly remove the following – radiator and cowl if fitted, front grill/chrome nose surround and antiroll bar. On E & ES models also remove air filter box from inside the nosecone.
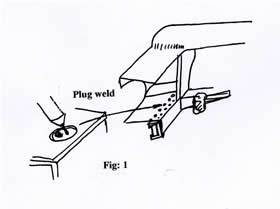
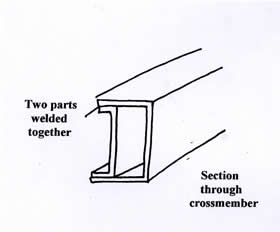
Using chisels, angle grinder etc. remove the old crossmember taking care not to damage the two main chassis rails and floor of the inner nose cone which forms with one of the two thickness's the top section of the crossmember. Once all metal has been removed repair any corrosion to the nosecone floor, main chassis rails etc. Next stage is to offer up the new crossmember. I have found using a jack the best way supporting the member into the correct position. Once correctly fitted the cossmembers position should be noted and the member removed. At this stage I usually weld the two sections of the new member together.
|